At endpointX, we work with many different customers and we’ve seen numerous different ways to complete the initial rollout of the Tanium Client to endpoints. One consistent theme we’ve seen is the use of Microsoft Intune for getting the client out to their workstation estates.
In this guide we’ll demonstrate how to install the Tanium Client via Microsoft Intune for Windows workstations.
You’ll need a few things to get started:
- Access to Microsoft Intune
- An admin terminal
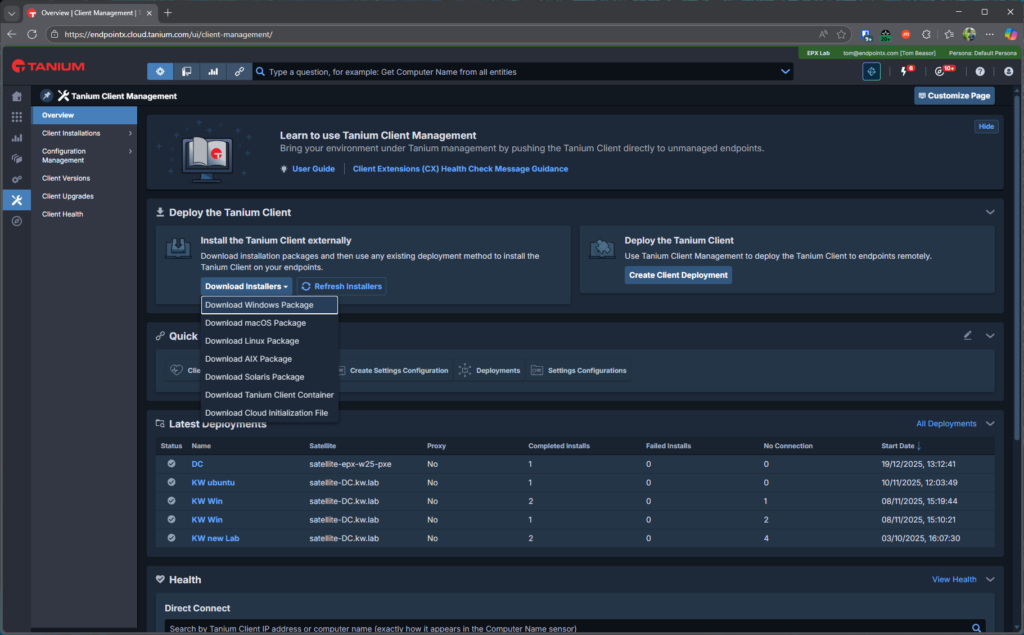
- Your Tanium Client Bundle (You can download the client bundle from your Tanium Instance via Shared Services > Client Management)
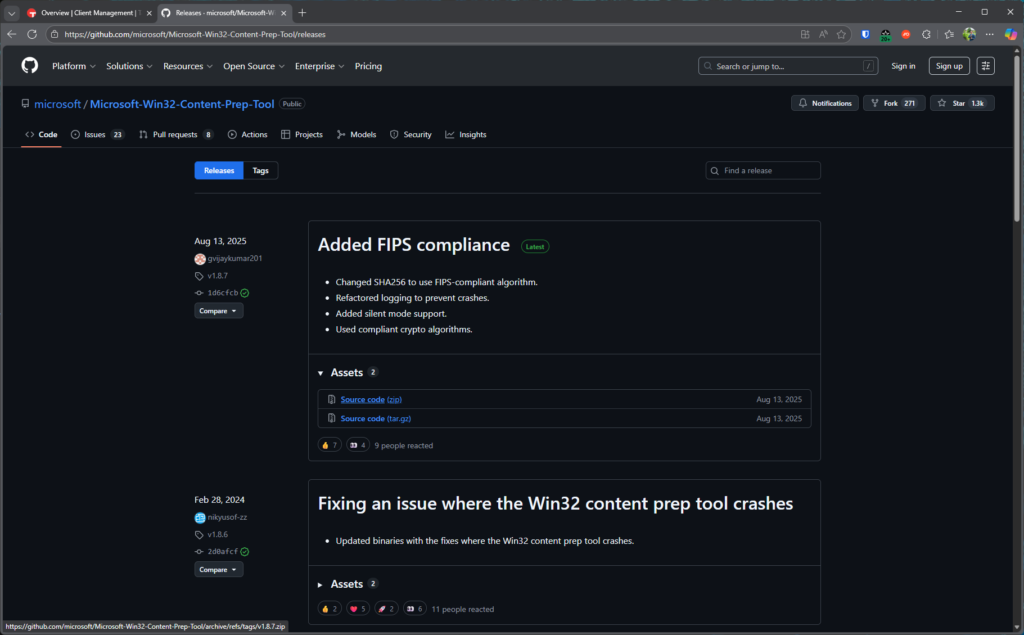
- The Intune content prep tool (Just grab whichever is the latest release – https://github.com/microsoft/Microsoft-Win32-Content-Prep-Tool/releases)
Part One – Prepare the .intunewin file
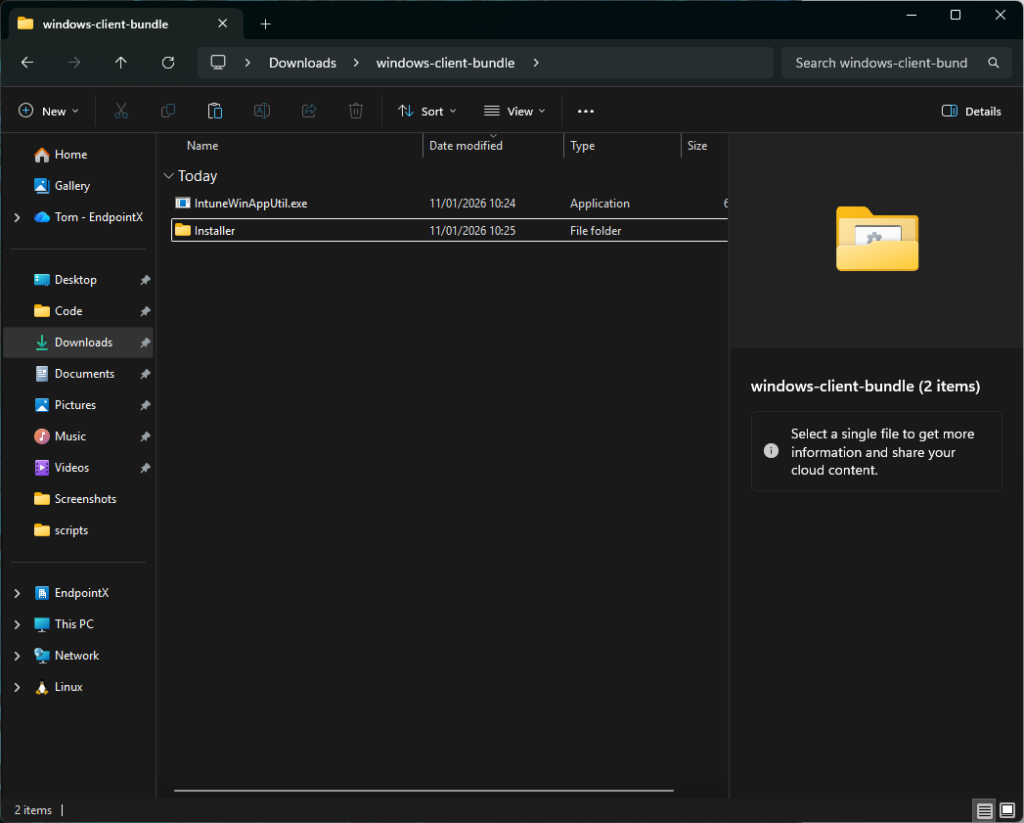
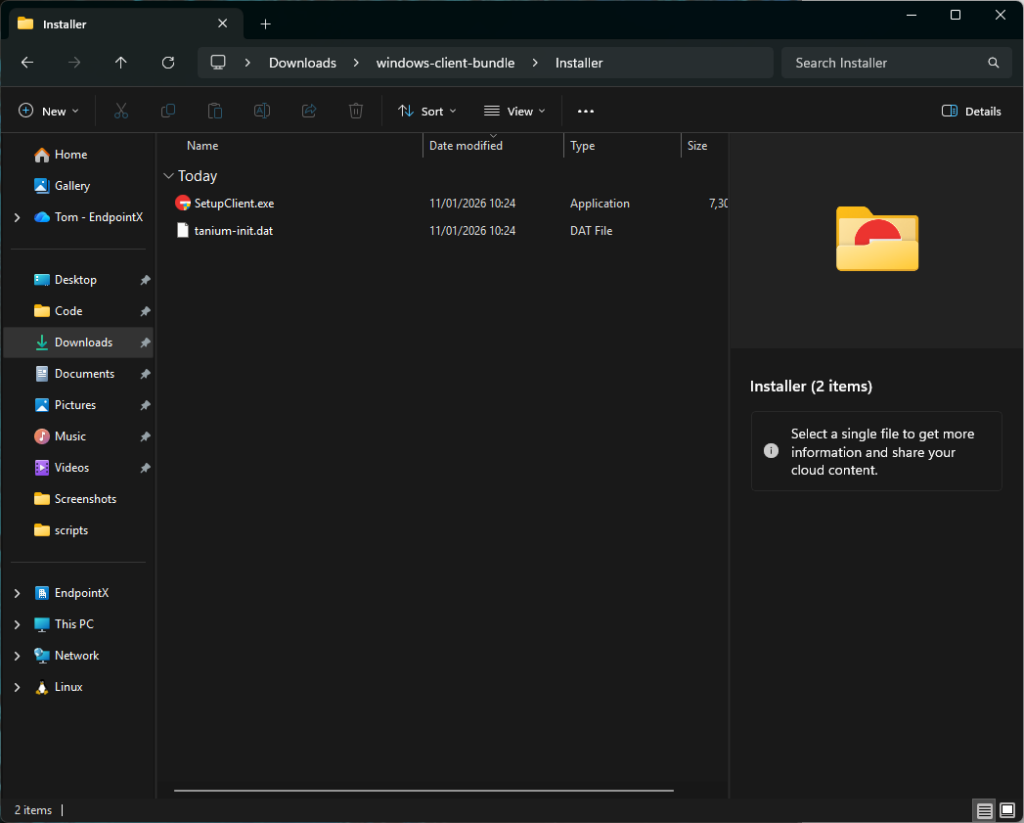
- Unzip both the Intune Content Prep Tool and your Tanium Client Bundle. Move ‘SetupClient.exe’ and the ‘tanium-init.dat’ file into a folder called ‘Installer’ and copy the ‘IntuneWinAppUtil.exe’ from the content prep tool also.
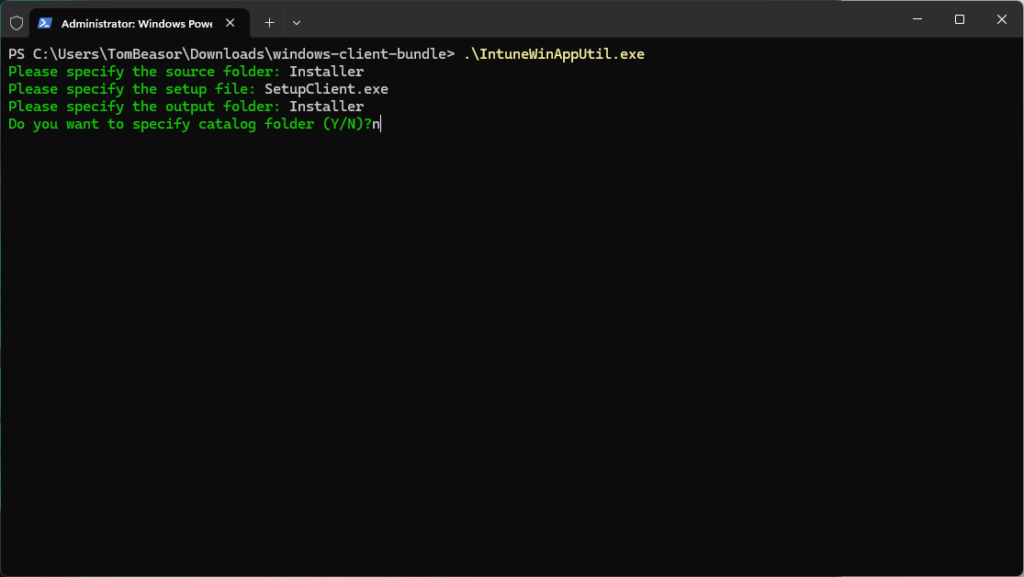
2. Open Windows Terminal as an administrator, and navigate to the folder containing your prepared client content.

3. Run the IntuneWinAppUtil.exe. It’ll prompt you to input details about the source folder, setup file, and destination folder.
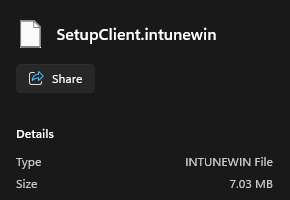
4. Once complete, you’ll have a ‘SetupClient.intunewin’ file in your ‘Installer’ folder – this is what you’ll be uploading to Intune and deploying to your clients next.
Part Two – Create and deploy via Intune
- Next the newly created SetupClient.intunewin file needs to be uploaded to Intune. To do this login to the Intune interface and navigate to Apps > Windows Apps and then click ‘Add’. The app type that needs to be selected is ‘Windows app (Win32)’.

- Next give the application an name, description, and enter ‘Tanium’ into publisher.
- In the next section, we need to enter an install and uninstall command, everything else can remain as default.


- Install Command: SetupClient.exe /ServerAddress={yourtaniumserver1,yourtaniumserver2} /S
- Uninstall Command: C:\Program Files (x86)\Tanium\Tanium Client\Uninst.exe /S

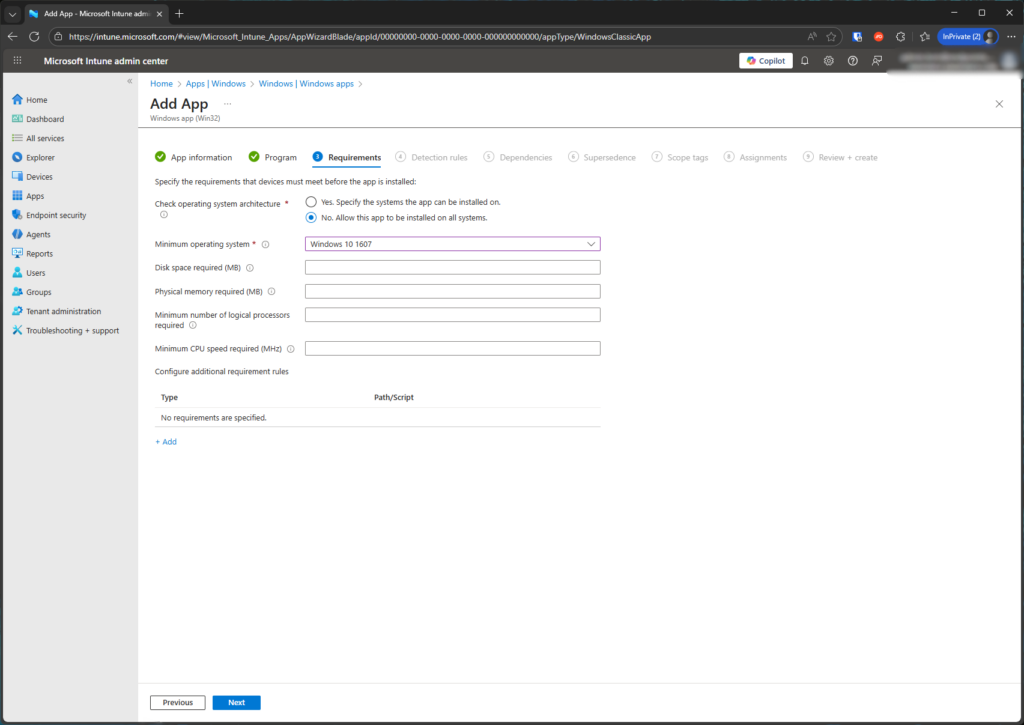
4. In the requirements section, select the minimum operating system version you want to install the Tanium client on. In this example, the earliest possible has been selected ‘Windows 10 1607’. Everything else can be left blank, or you can enter minimum space or memory requirements if you have limits you want to adhere to in your specific environment.
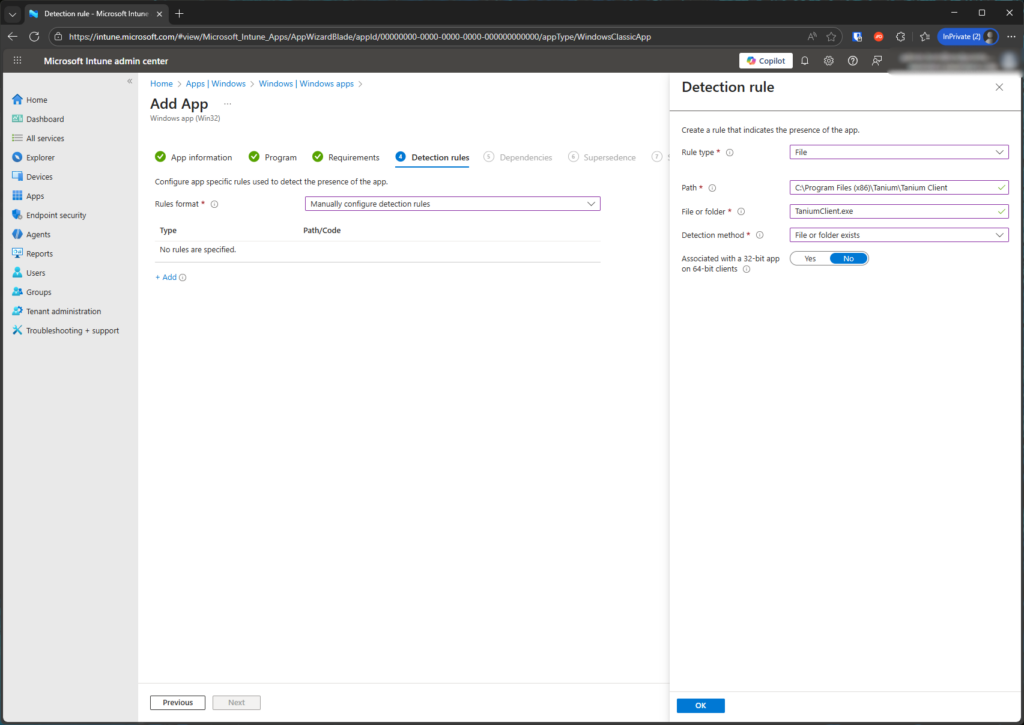
5. In the detection rules section, select ‘Manually configure detection rules’ and use the following detection rule.
- Rule Type: File
- Path: C:\Program Files (x86)\Tanium\Tanium Client
- File or Folder: TaniumClient.exe
- Detection Method: File or Folder Exists
- Associated with a 32-bit app on 64 bit clients: No
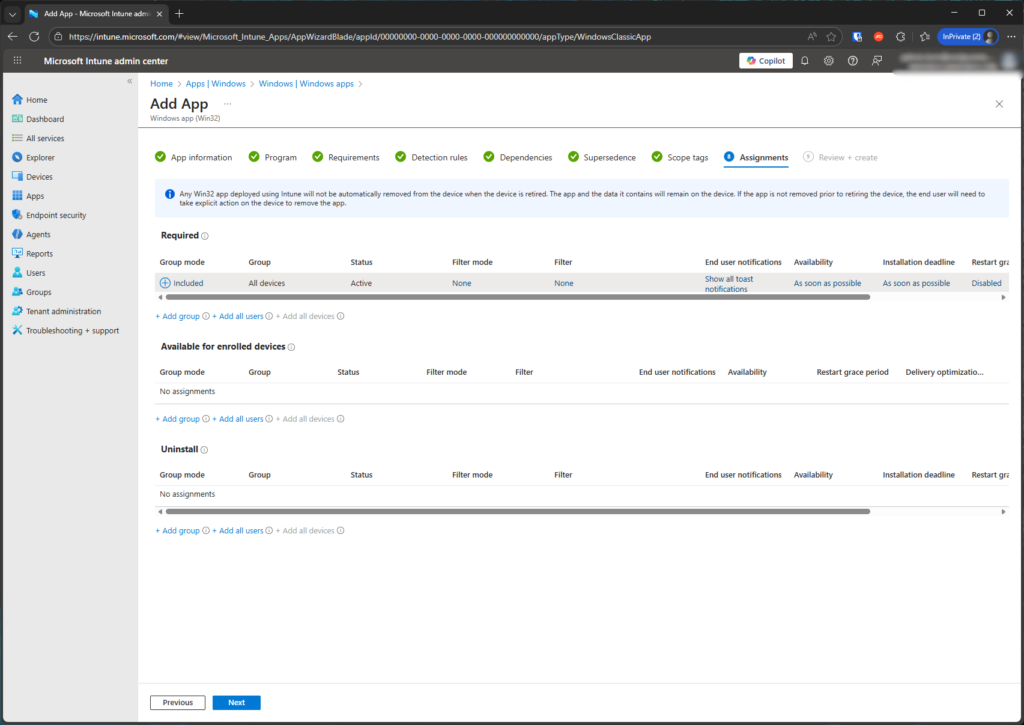
6. Next, simply assign the app to the Entra group you wish to deploy the client to, or make it available in company portal for certain users. In the screenshot below, “All devices” has been selected so all managed workstations will have the Tanium Client installed.
And that’s it! You’re now deploying the Tanium Client via Microsoft Intune. It’s now a case of monitoring the deployment and watching the numbers of clients increase in Tanium via Administration > Client Status.
Of course, this method isn’t limited to just Tanium, you can package any Windows installer using this method – just adjust the details accordingly.
endpointX are both Tanium and Microsoft partners, and we can offer a managed services and hands-on-keyboard engineering for both Tanium, and Intune! Please reach out to us to find out more about the services we can offer to help your Tanium and Intune deployments.